Quick Fix: Transfer Box PTO cover leak
A leaking Transfer box is not uncommon as there are some very common places it leaks from such as the bottom cover plate, intermediate shaft seal and font/rear output housing seal, but i've not seen one leaking from the PTO cover before.
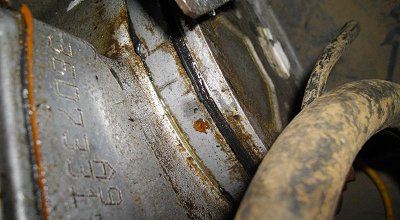
My transfer box had been leaking since I fitted it a year ago. It was originally dry so I never knew there was a leak before fitting, but the oil droplets on the driveway have lead my investigations to the PTO cover. In the interests of not wanting constantly top up the transfer box and wasting my lovely expensive oil, I thought i'd replace it.
What you'll need
This depends on your transfer box serial number
All models:
- RTV sealant
- 15mm socket + wrench
- Screwdriver
Up to serial 288709E:
- Bearing housing to casing gasket - FRC5413
From serial 288709E:
- Hylosil 2000 - STC611
What to do
After cleaning all around the cover, remove the 5 nuts and 1 stud from the casing. Lever the PTO cover away from the main casing with a screwdriver on the "ears".
As you do it, a lot of excess oil will spill out. Remove the cover plate and you will see the input gear bearing. Clean any gasket or sealant from the mating surface.
The cover is made up of a bearing carrier (with the bearing race) and a cover plate that fixes to this. I wasn't sure which gasket was leaking so I split them apart with a sharp edge. Clean each up nicely and remove and sealant.
You will need to refit the bearing carrier first and then the cover onto this. It is important not to use a paper gasket if there wasn't one originally and vice versa. This is because the carrier imparts a preload on the input gear bearing which you don't want to mess around with. Fit your paper gasket (it goes between the cover plate and the bearing carrier), or in my case the Hylosil 2000. It's not cheap stuff at about £12 but I wanted to use what was listed in the manual. It's probably okay to use RTV sealant in its place, but that's your call.
Spread the sealant around every flat area and ring every bolt hole. Smooth the sealant out to get rid of air bubbles once you have placed a bead as shown here. You can do both at the same time, as RTV needs a bit of time to "go off".
Place the bearing carrier up to the transfer box casing, taking care with the bearing race. The carrier will only fit one way. Put two bolts through to hold it in place or it may be able to hold itself. Place the cover plate and fit all the bolts/stud with threadlock and torque to 25NM.
It only took about 45 minutes and so far so good!


